Thursday, May 31, 2012

Let Summer Vacation Begin!

This morning I waved good-bye to my kids for the last time this year as they headed off to school. We have spent the last week attending award ceremonies, end of year parties, and baking goodies for the teachers.


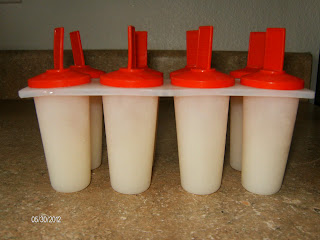
But, today, when my kids scream through the door at noon, summer vacation will begin. We will spend our summer at the library, the pool, and in the backyard. We will make homemade popsicles and sip smoothies. We will stay up late and sleep in. And, of course, we will move across the country.


But, most of all, we will enjoy having our kids at home where we can enjoy them!


What are your plans for summer vacation?

This post has been linked to Try New Adventures Thursday.


Wednesday, May 30, 2012

Burritos


This is a classic make-ahead recipe that is simple to make. It works perfectly with leftover meats, beans, or rice.  And, with all the variations that can be made with the ingredients, it is not so much of a recipe as it is a technique. The Burrito pictured above is made with chicken, pinto beans, rice, and cheese. But, the best part about these Burritos for me is that they are a 5 out of 5 in my family!

Burritos

1 lb. browned ground beef, or 2 cups cooked chicken, or 2 cups cooked rice
2 cups cooked beans (pinto, red, or black)
2 cups salsa (mild, medium, or hot)
4 oz. can green chilies
Taco Seasoning (1 envelope or homemade equivalent)
Cheese, optional
24 flour tortillas

Stir together meat, beans, salsa, chilies, and taco seasoning. Warm the tortillas slightly to make them more pliable for rolling. Fill with meat mixture and add cheese if desired. Roll up burrito style. Wrap individually in aluminum foil. Or, place on a baking sheet with the number of desired burritos, cover with foil. Bake at 350˚ for 30 minutes.  Leftovers can be frozen (prior to baking) for lunches or for additional meals.  Individually wrapped burritos can be heated in the microwave once the foil is removed.

Recipe Note: We have found that if we make these Burritos vegetarian style with rice, we prefer to use a spicier salsa. This boosts the flavor to compensate for the lack of meat.

This post has been linked to The Thrifty Home: Penny Pinching Party.

Tuesday, May 29, 2012

Chocolate Banana Muffins


My kids love chocolate in the morning: chocolate waffles, chocolate oatmeal, and these chocolate banana muffins. They are just a variation of my basic muffin recipe and they are pretty enough to be served to company. Plus, they make use of bananas that might otherwise go to waste. 

Chocolate Banana Muffins

¼ cup melted butter
½ cup raw sugar
¾ cup milk
1 egg
1 ½ cups white whole wheat flour
¼ cup unsweetened cocoa powder
2 tsp. baking powder
¼ tsp. salt
2 over-ripe, mashed bananas
Mini chocolate chips, optional

In a mixing bowl melt butter in microwave. Add sugar, milk and egg. Stir to combine. Add flour, cocoa powder, baking powder and salt. Stir just until moistened. Add bananas. Scoop into a greased muffin pan and sprinkle with chocolate chips. Bake at 400° for 15-20 minutes or until a toothpick comes out clean.  Yield: 12 muffins

This post has been linked to Frugal Tuesday Tip.

Monday, May 28, 2012

A Day to Remember

Today we celebrate Memorial Day: a day that many will spend picnicking with friends and family. However, the reason that we can freely enjoy this holiday is because of our soldiers. I encourage you to say a prayer today remembering those who serve and those who have served. But, most of all, please pray for those families whose soldiers have paid the ultimate sacrifice for the freedom that we enjoy today.

As a military family, we come in contact with soldiers and their families every day: brand new families beginning their military careers together, seasoned military families who have weathered many deployments, and retired military families who continue to serve soldiers even after they have completed their service. Thank you to each and every one of you that has selflessly served. And finally, I want to say thank you to my husband for his dedication to serving soldiers as a chaplain. It is an honor to minister with you.


Friday, May 25, 2012

Real Food

I read this book a couple of years ago. However, recently I have both given a copy as a gift and loaned out my own copy. When I received my copy back the other day, I thought it might be a good choice for a  book review.  

Real Food: What to Eat and Why Written by Nina Planck

Nina Planck grew up eating traditional foods. Raw milk, free range eggs, fresh butter, in-season fruits and vegetables, and local honey.  As she got older though, she strayed from this way of eating and found herself becoming a vegetarian. But, Nina became dissatisfied with this way of life and found herself to be “plump and grumpy.” And, thus she turned back to traditional foods, by way of the farmer’s market.

Nina has become the trendsetter for the return of the farmer’s market; and, her nutritional advice is sound. She includes information on produce, dairy, meat, fish, chocolate, and many other real foods. And, Nina Planck is in good company with other food writers such as Michael Pollan, Joel Salatin, and Marion Nestle. So, if you are making an effort to walk away from industrial foods and embrace ancient traditional food wisdom, this would be a good read for you. Nina’s writing style is personable and easily applicable making  Real Food more like a life story than a book on nutrition.

Thursday, May 24, 2012

Ham and Cheese Rolls


It is the end of the school year and my kids are getting tired of our typical lunchbox routine.  I have been trying to mix it up by sending crumpets or pizza rolls instead of sandwiches. However, I am still hearing complaints. So, I tried something different with my artisan bread dough: Ham and Cheese Rolls. I made them just like the pizza rolls, only I used ham and cheddar cheese instead of pepperoni and mozzarella cheese. The kids liked them and were happy about their new lunchbox treat. Another crisis averted!

Recipe Note: I make my dough using half white whole wheat flour and half all purpose flour. You can find the Master Recipe for artisan bread dough, along with an instructional video, here.

Ham and Cheese Rolls

2 lbs. artisan bread dough
4 slices deli ham, cut into 24 pieces
24 nickel sized pieces of cheddar cheese
3 Tbsp. melted butter

Divide dough into 24 pieces. Using your hands, flatten each piece of dough into a circle that is the size of your palm. Place cheese in the center of the dough and top with ham. Fold the dough up over the cheese and ham, pinching the seams to form a seal. Place, seam side down, in a greased 9X13 pan. Repeat with remaining dough. Let rest 30 minutes. Bake at 400˚ for 20 minutes or until golden. Remove from oven and brush with melted butter. Serve immediately.

This post has been linked to Try New Adventures Thursday.

Wednesday, May 23, 2012

Coffee Bark


Have you ever had chocolate covered coffee beans? So decadent! However, they can be a bit pricey.  So, a couple of years ago I came up with this alternative that is simple to make and much more affordable. I made this a couple of weeks ago for my husband as a gift for his birthday. He was in heaven. And, the best part for him is that the kids don’t like the Coffee Bark, so he gets to keep it all for himself.

Coffee Bark

½ cup whole bean coffee
12 oz. pkg. semi sweet chocolate chips

Pour coffee beans into a coffee grinder and pulse 2-3 times to roughly chop the beans. Put chocolate chips into a microwave safe bowl and heat on high for 30 seconds. Stir and repeat process until chocolate is completely melted. Stir in coffee beans. Spread onto a parchment paper lined baking sheet. Refrigerate until firm and break into pieces. Store the coffee bark in an airtight container in the refrigerator.

This post has been linked to The Thrift Home's Penny Pinching Party.

Tuesday, May 22, 2012

Gravy


There is something about gravy that makes me sigh with content every time I eat it. In my mind, it is comfort food at its best. And, it is a frugal way to liven up inexpensive cuts of meat. It can be made with the leftover cooking fat from pork chops, chicken, steak or ground sausage. It works well with butter, olive oil, or leftover bacon grease too. The liquid can be water, broth, or even milk. Sautéed onions or mushrooms are also great additions. The technique is simple, and it is an easy way to add variety without going over budget.

Pictured above are simple pork chops with brown gravy. I used some leftover bacon grease to pan fry my pork chops. Then, I used homemade chicken broth for the liquid. Finally, I served it all over rice.

Gravy

3 Tbsp. fat (butter, olive oil, bacon grease, or meat fat)
3 Tbsp. flour
2 cups liquid (chicken broth, beef broth, milk, etc.)
½ tsp. ground black pepper
Salt to taste

Heat the fat in a skillet over medium heat. If you are using the fat from meat you have just cooked, push the meat to the side of the pan or if you prefer, remove it from the pan. Turn the heat down to low. Add the flour. Stir and cook the flour until browned and bubbly, being careful not to burn it, about 2-3 minutes. Whisk in liquid. Continue to whisk until thickened and smooth. Return the meat to the center of the pan and heat thoroughly. Add pepper and salt to taste. 

Frugal Tip: Gravy adds variety to your dinner without going over budget.

This post has been linked to Frugal Tuesday Tip.

Monday, May 21, 2012

Bok Choy Salad


Do you ever get tired of green salad? We eat a lot of it at our house, so I try hard to offer a variety of salads and dressings. Bok choy is a great alternative to green leaf lettuce and it offers a big crunch. I like to chop it into small pieces, making it easier to eat. The recipe below is simple to make at the last minute and it looks a lot prettier than a traditional salad, with it's dark green leaves and white stalks. It is the perfect salad to take to a picnic or gathering of friends and family.

Bok Choy Salad

1 bunch bok choy, washed and chopped
1 bunch green onions, sliced
½ cup sliced raw almonds

Combine bok choy, green onion, and almonds in a salad bowl.

Dressing:
¼ cup olive oil
2 Tbsp. white vinegar
3 Tbsp. raw or white sugar
1 ½ Tbsp. soy sauce

Whisk together all ingredients in a small bowl. Drizzle over salad and toss to combine. Serve immediately.

This  post has been linked to Mop It Up Mondays.

Friday, May 18, 2012

Reading Report

Last week at the library, I picked up a book that I had as a child. I remember reading it over and over again, so I thought that my kids might like it too. All three of my kids enjoyed reading it. And, all three of them read it multiple times. But, best of all, it created a desire for them to pop popcorn together and eat it as a family. Quality time together indeed!

The Popcorn Book written by Tomie de Paola

This is a fun book that teaches kids about the history of popcorn while incorporating the fun of how to pop it at home on top of the stove. The facts are understandable for pre-school children and yet interesting enough to hold the attention of upper elementary school kids. And, the foible that the kids find themselves in the end makes this book both educational and entertaining. I would recommend this book to anyone wanting to draw their kids into the kitchen for some fun family time; or, to anyone that would like to integrate educational value into story time.

The second book that I would like to tell you about is one that I received for free as a review copy from Bethany House. Please know that I have not been compensated by this company to write this review; and, all opinions expressed here are my own.

The Messenger written by Siri Mitchell

This book is a work of historical fiction that takes place during the Revolutionary War. The main character, Hannah, is a Colonial spy. Along with her partner, Jeremiah, they diligently work together to free a group of prisoners. Among these prisoners is Hannah’s brother. However, Hannah’s Quaker faith creates a moral dilemma within her soul that causes her to battle fiercely with her understanding of right and wrong.

Although I enjoyed this book, I found it difficult to dig into at first. It was a quick read and the story was compelling; but, I probably would not have picked this book up had I not been offered a review copy. However, I would certainly say that Siri Mitchell is an excellent writer and that if you are looking for a quick read, with entertainment value, this would be a good choice for you.

To learn more about this weekly reading report, click on the tab above.

Thursday, May 17, 2012

Muesli


While living in Germany, my husband fell in love with Muesli. It was an inexpensive breakfast or snack. However, when we moved back home, we found that Muesli was very expensive. So, it became a rare treat. When I started thinking about birthday gift ideas for my husband, Muesli was one of the first things that came to mind. I did some online research and made a list of ingredients that I remembered to be in the Muesli that he loved so much and I came up with this recipe. When I put it together, I made myself a bowl right away to taste it. Well, I ate two bowls full and decided to make another batch because I knew that my husband would devour it in no time flat.  And, I was right. He enjoyed it so much that I have made yet another batch since then.

Muesli

4 cups old fashioned oats
2 cups unsweetened puffed wheat
½ cup sliced raw almonds
½ cup chopped pecans
½ cup flax seeds
½ cup sesame seeds
½ cup unsweetened shredded coconut
½ cup raisins
½ cup dried cranberries
½ cup dried chopped dates

Mix all ingredients together in a large bowl. Store in an airtight container. Yield: 10 cups. Serve as a cold cereal with milk, or over yogurt.

This post has been linked to Try New Adventures Thursday.

Wednesday, May 16, 2012

Bacon Grease


Although we love bacon, we don’t eat it very often. The price tag seems a little high to me; especially when you consider all of the fat that is left over after cooking it.  So, it has become an occasional treat at our house. However, when I do cook bacon, I always save the grease. The last pound of bacon that I cooked rendered ¾ cup of grease! While still liquid, I pour it into a glass bowl and refrigerate it for later. I then use it as a cooking fat for searing pork chops or other meats. It is also great to use when making gravy. (I’ll tell you more about my gravy technique next week.)

Being mindful of food waste is a way of life for our family. However, for many this is new and unfamiliar. If you are learning to cut down your grocery bill, you may want to click on the Something for Nothing tag (located on the sidebar in the list of recipes) to see other recipes for kitchen scraps that you might typically discard. Or, click on the Frugal Tips tab above to learn some other ways to cuts costs on your food budget.

If you have a Something for Nothing tip, please share it in the comments below. I would love to learn what works for you!

This post has been linked to The Thrifty Home Penny Pinching Party.

Tuesday, May 15, 2012

5 Grain Hot Cereal


I have always loved multi grain hot cereals. However, they can be quite pricey at the grocery store. This is a homemade version that is simple, nutritious, and economical.  It is naturally sweet, so be careful not to add too much sweetener at first. I like mine topped with cream, but it would also be good with nuts and/or dried fruit sprinkled on top.

5 Grain Hot Cereal

1 cup old fashioned oats
½ cup brown rice
½ cup barley
½ cup white whole wheat flour
½ cup corn meal

Add the oats to a blender and process until it becomes flour consistency. Pour into a quart sized Mason jar. Repeat with the brown rice and pour into the jar. Repeat again with the barley and pour into the jar. Add white whole wheat flour and corn meal to the jar and shake to combine. Cover and store in an airtight container. Yield: 3 cups

To serve: To a sauce pan, add 1/3 cup cereal and 1 cup water. Turn heat to medium high. When it begins to boil, turn the heat to low, simmer and stir until desired consistency (3-5 minutes). Serve with sugar or honey and cream or milk to taste.  

This recipe has been adapted from the one found here.

This post has been linked to Frugal Tuesday Tip.


Monday, May 14, 2012

Triple Berry Crisp


We have had a lot of festivities over the last week. We have celebrated a graduation, a birthday, a piano recital, Mother’s Day, and a farewell dinner with friends. Our time is short here in Texas and we are finishing up with all of our commitments and are beginning to say our farewells. Although we have only lived here for a year, we have found true friends and neighbors that we will sorely miss.

For my husband’s birthday, we had this Triple Berry Crisp. Because my husband is not a big fan of cake, he always requests a fruit dessert for his birthday. This recipe is a little different in that it has a crisp layer both under and on top of the fruit. During berry season, you can use fresh, but I have also used a one pound bag of frozen mixed berries and it has turned out well.

Triple Berry Crisp

1 cup white whole wheat flour
1 cup old fashioned oats
¾ cup raw or brown sugar
½ tsp. cinnamon
¼ tsp. nutmeg
½ cup butter, softened
¾ cup blue berries
¾ cup raspberries
¾ cup blackberries or sliced strawberries

In a large bowl, add flour, oats, sugar, cinnamon, nutmeg and butter. Using a pastry blender or a fork, combine until crumbly. Press half of the mixture into the bottom of a pie plate. Top with the berries. Evenly sprinkle the rest of the topping onto the berries. Bake at 350˚ for 30-35 minutes or until the topping is crisp and the fruit is bubbling.

Note: This recipe can be doubled and baked in a 9X13 pan to serve a crowd.

This post has been linked to the Ultimate Recipe SwapMop It Up Mondays.


Friday, May 11, 2012

Play With Your Food

This week I got something a little different from the library.  A book filled with pictures of food that look like animals. Surprisingly it was located in the cookbook section and I have to say, I am glad that I found it!

Play With Your Food written by Joost Elffers

This is a picture book highlighting fruits and vegetables that look like animals. The author/artist has scoured farmer’s markets and road side stands to find unique looking produce that has animal like characteristics. He searches specifically for pieces that only need minimal alterations in order to appear life like. He then adds eyes, or ears, or legs to enhance the look. The author uses vegetables like peppers, sweet potatoes, and squash. And, he uses fruits like pineapple, cherries, and pears. These he turns into mice, elephants, insects, and birds.  And, after having fun with the food, he eats it!

This book was enjoyable to look at. My kids have poured over it many times in the last couple of weeks. And, I think that it would be a great idea to take my kids to the farmer’s market to allow them to choose a piece of fruit or a vegetable to turn into their own animal creation. Finicky palates just might be more willing to try something new if it looked like a turtle or a teddy bear. So, if you have young children or picky eaters, you would enjoy this book. And, what a helpful tool to get your kids to eat their veggies!

If you would like to learn more about this weekly reading report, click on the tab above.
Thursday, May 10, 2012

Toad in the Hole


I have a confession: my kids and I are not in love with eggs. We eat them on occasion, but not regularly. Now, my husband is another story. He loves eggs and has, at times, eaten them every day for breakfast for weeks on end.  But, eggs are a versatile and frugal food, so we decided to try this recipe out. It is so simple it can hardly be called a recipe.  I made this for myself earlier this week for lunch. And, since it turned out to be so quick and easy, I decided to serve Toad in the Hole for dinner last night.  My kids definitely loved the name and the way this looked on their plates. Although this recipe did not convert us all into egg lovers, I will certainly make it again.
  
Toad in the Hole

1 slice of bread
1 egg
Butter
Salt and Pepper to taste

Heat a skillet to medium high heat. Add a small amount of butter to the pan, coating the pan evenly.  Cut a hole in the center of the bread, using a cookie cutter or a small glass. Place the bread in the skillet. (You can also cook the bread circle that you cut out, to serve on the side.) Crack open the egg and gently pour into the hole in the bread.  Cook until the egg has set. Then flip and continue cooking until desired firmness (less time for a runny yolk, more time for a firm yolk). Salt and pepper to taste. Serve immediately.

This post has been linked to Try New Adventures Thursday.

Wednesday, May 9, 2012

Roasted Potato Slices


This is a simple and frugal potato recipe that looks pretty enough to be served to company. The recipe can be doubled or tripled to serve a crowd, or it can be halved to serve two. And, you can vary the seasonings to your taste. My family gobbled this up last night, and was asking for more. A 5out of 5 recipe for sure!
               
Roasted Potato Slices

4 medium sized potatoes
4 Tbsp. melted butter
Rosemary
Salt and Pepper to taste

Thoroughly wash potatoes. Thinly slice and arrange, standing upright, in a baking dish. Drizzle with melted butter. Sprinkle with rosemary, salt and pepper. Bake at 375˚ for 1 hour and 15 minutes. Serve immediately.

This post has been linked to Penny Pinching Party.

Tuesday, May 8, 2012

We Have No A/C

Our air conditioning has been out for two days now. So, with temperatures at 95-100˚ every day, our house is hot. Thankfully, we had some thunderstorms last night to cool things off a bit. As a result, I have been keeping the cooking to a minimum. I certainly do not want to add any more heat to our house.

After having had a broken oven for two weeks, and now this, it seems like I am becoming a pro at improvising. It would be easy to just stock up on convenience foods when something like this happens, or head straight to a restaurant for our meals. But, as I have told you before, I find is somewhat enjoyable to stretch my mind and cook creatively.

Over the last couple of days I have…

… pulled some Seasoned Brown Rice out of my freezer for a quick side dish.


… made Nut Free Trail Mix for the kid’s lunches instead of the Granola Bars that I had planned to make.


… served leftovers and cleared out our refrigerator. We polished off some slow cooker chicken, pan seared pork chops, and Ranch Dip with veggies.


Doing all of these frugal things helped to keep me on track with our grocery budget. And, hopefully, our A/C will be fixed today and we’ll be back to normal again!

This post has been linked to Frugal Tuesday Tip.

Monday, May 7, 2012

Buckwheat Pancakes


This week we have had the pleasure of visiting with our good friend Susan. We met Susan and her family while living in Germany. But, we truly got to know them when we took a trip to London together. It has been such a blessing to have her here.

Susan is both gluten and lactose intolerant. So, one morning for breakfast I made these Buckwheat Pancakes, which was something new for Susan. I substituted soy milk for regular milk and coconut oil for the butter and the pancakes turned out beautifully. Everyone gobbled them up gladly.

The coolest thing about our visit is that I was able to help Susan start her own blog for her family. We had so much fun choosing a name and picking pictures to post. Susan is my first “real life” friend to join me in blogging!

Buckwheat Pancakes

2 cups buckwheat flour
2 tsp. baking powder
¼ cup sugar (raw or white)
1 tsp. salt
2 eggs
2 cups milk
4 Tbsp. melted butter

Measure the dry ingredients into a bowl. Add eggs, milk, and melted butter. Stir just until combined.  Pour batter onto hot greased griddle and cook until bubbles on top pop (about 3-4 minutes). Flip and cook for an additional 2-3 minutes, or until thoroughly cooked. Serve hot with syrup. Yield 14-18 pancakes.

This post has been linked to Mop It Up Mondays.

Friday, May 4, 2012

365 Ways to Live Cheap

My kids have been on a Boxcar Children kick lately. I read the first book to them a couple of months ago and they are now fascinated with these creative and resourceful kids. This week we listened to The Yellow House Mystery (Book 3). And, of course, they loved it. My son is also reading Blue Bay Mystery (Book 6) for his homework every day. And, I read a frugal living book this week that a friend loaned to me and learned some great tips for saving money.


This little book of frugal tips and tricks is filled with money saving strategies and techniques that can save both money and time. It is a comprehensive book that includes advice on areas such as cars, clutter, health, and groceries. And, the topics are organized in a logical manner allowing the reader to skip around the book to find what is most beneficial, when needed.

Trent Hamm is also the author of The Simple Dollar, a financial blog offering practical advice for average people. If you are a long time reader of Trent’s blog, you may find that many of these tips can be found there. However, it is nice to have it all in one place as a reference that is categorized for easy use.

This book is perfect for those just starting out in frugal living. The tips are practical and reasonable. And, even a seasoned frugal girl like myself, learned some new tips. I would recommend this book particularly to someone that needs to cut expenses quickly or to someone who is transitioning from a two income family to a one income family. A great resource for pinching pennies without sacrificing quality of life!

To learn more about this weekly reading report, click on the tab above.

Thursday, May 3, 2012

Sausage and Rice Casserole


This is a comfort food recipe that my husband especially loves. He was out of town for several days last week and I made this for him when he got home. He was pleased and said, “Now, this is a recipe to come home to!” I like to use homemade pork sausage and seasoned brown rice from my freezer, but it still works well with purchased sausage and a boxed rice mix. And, this is one recipe that all of my kids will gobble up gladly.

Sausage and Rice Casserole

1 lb. ground pork sausage, browned
1 cup sour cream
2 cups cooked seasoned rice (or 6oz. pkg. instant long grain and wild rice mix, prepared)
1 cup grated cheddar cheese

Stir together pork sausage and sour cream. In a casserole dish, layer half of the rice, half of the meat mixture, and half of the cheese. Repeat layers. Bake at 350˚ for 30 minutes. Serve immediately.

Wednesday, May 2, 2012

Wheat Crackers


Yesterday, I told you about the Roasted Red Pepper Spread that we have fallen in love with. These Wheat Crackers are a perfect dipper for this spread. Crackers are so simple to make and taste so much better than store-bought; you may never buy them again! We like these plain, with a spread, or with cheese. And, surprisingly, my kids will dig through them to find the darkest ones to eat first.

Wheat Crackers

2 cups white whole wheat flour
1 tsp. baking powder
½ tsp. salt
2/3 cup warm water
1/3 cup olive oil
Additional olive oil and salt for topping

Stir together all ingredients until a soft dough forms. Divide the dough into two portions and evenly roll out each portion onto a greased 10x15cookie sheet (the dough should be rolled all the way out to the very edges of the pan).  Cut the dough into squares, with a knife or a pizza cutter, into the desired cracker size. As the dough bakes, the crackers will shrink and separate. Brush lightly with olive oil and sprinkle with salt. Bake each sheet of crackers individually at 400˚ for 10-12 minutes. (Watch these carefully, they can brown quickly just like cookies.) Cool completely and store in an airtight container for up to a week.

Optional Toppings: In addition to the salt, toppings such as rosemary, poppy seeds, sesame seeds, parmesan cheese, or dried onion can be sprinkled on top of the crackers before baking.

This post has been linked to The Thrifty Home: Penny Pinching Party.

Tuesday, May 1, 2012

Fascinating Find - Roasted Red Pepper Spread


As we get closer and closer to our big move, we have been making a concentrated effort to eat up all of the food in our pantry, fridge, and freezer. I have had a jar of roasted red peppers hanging around for a while, so when I saw this simple recipe for Roasted Red Pepper Spread on Trish's blog, Mom On Time Out, I just knew I had to try it.

The results were spectacular! Everyone at my house loved it, resulting in a 5 out of 5 rating, which is rare for us. We ate it with crackers, but it would be excellent with tortilla chips, bagel chips, or even as a sandwich spread. I have made it twice now and I can honestly say that this recipe is now one of our favorites.

Be sure to check out Trish’s blog for more recipes, craft ideas, and money saving tips. Thanks Trish for such a great recipe!

Blog Link: Mom On Time Out
Related Posts Plugin for WordPress, Blogger...