Showing posts with label The Frugal Kitchen. Show all posts

Tuesday, February 11, 2014

French Toast Sticks


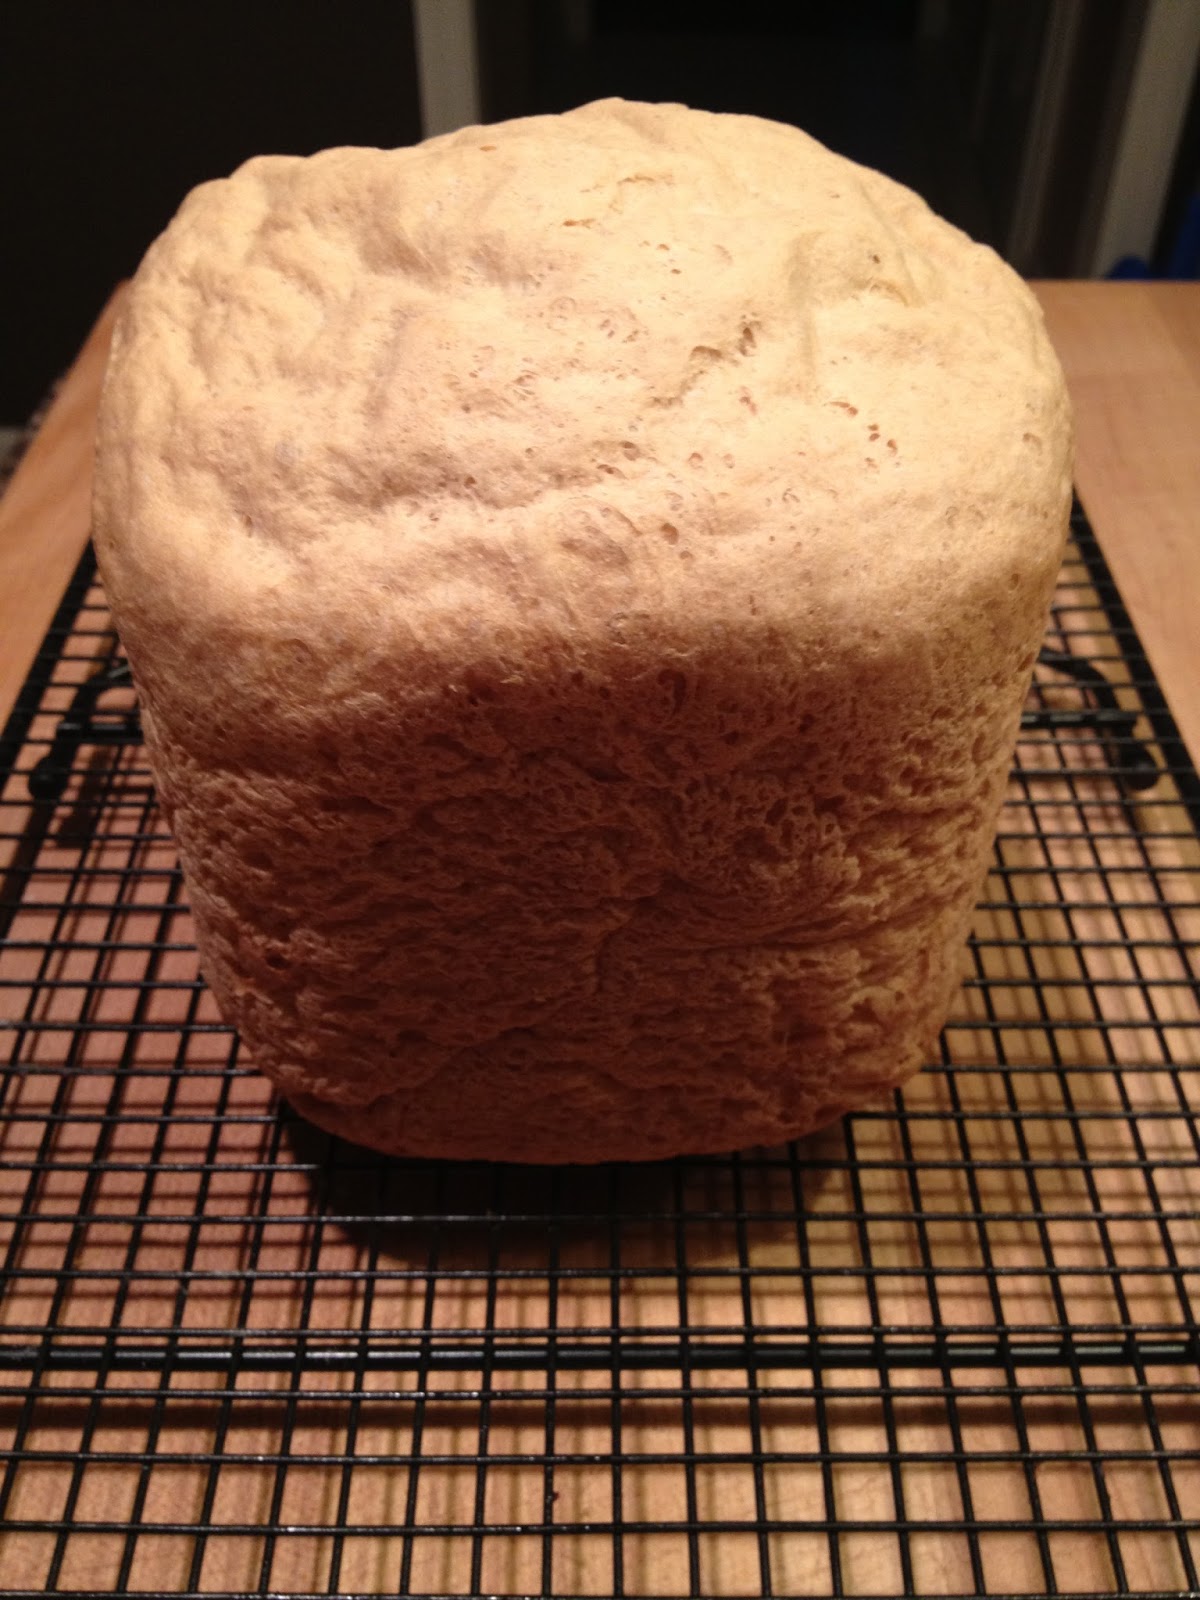
My last loaf of Bread Maker Bread did not turn out well. It did not rise properly and was too dense for sandwiches. So, to keep it from going to waste, I made French Toast Sticks with it. I cut the bread into one inch slices and then cut each piece into four sticks. I dipped the sticks into an egg and milk mixture and then cooked them on a griddle just like traditional French Toast. My kids really enjoyed eating the sticks with their hands and dipping them into syrup. (Two of my kids dipped theirs in Cinnamon Syrup and my little one dipped hers in Chocolate Syrup.)
 
I refrigerated the leftovers and reheated them in the toaster oven for my little one to eat for lunch the next day. Next time, I would like to try an oven version instead. Seems like it would be simpler and I wouldn't have to stand over the griddle tending to them. If you have tried making homemade baked French Toast Sticks, I would love to hear about it.

Sunday, January 5, 2014

New Year's Kitchen Goal

 
Last year I shared with you my New Year's Frugal Kitchen Goal. Overall, I feel like I have achieved that goal. However, I have to admit that I abandoned the part of my goal where I aimed to prepare more homemade convenience foods. Although this had worked for me in the past, I felt like it was unrealistic concerning my new family dynamic. 

This year, my goal is a bit different. In 2014, I plan to simplify my time in the kitchen. This means that I would like to cook meals with fewer ingredients, cook/bake less often, and provide school lunches with minimal fuss. Plus, I want to maintain my current grocery budget and my commitment to serving “real” food. 

I have already been prowling around my grocery store looking for new options. Over the last couple of months, I have introduced some new things to my kids and they have been pleased. For example, I have found that my kids really like natural cashews and pistachios. In the past, I had only bought peanuts, almonds, and pecans. 

Do you have some simple recipes or "real" food solutions that your family loves? If so, please share! 

Thursday, October 3, 2013

Dill Dressing


We have spent the last couple of days eating up the odds and ends in the refrigerator. Leftover pork, leftover taco meat, half a cucumber, a bit of lettuce, etc. We typically have a leftover night each week to finish off these leftovers and this has really helped to reduce our food waste. To go along with our lettuce and other bits of produce, I made up this Dill Dressing. As I was whisking it together I realized that I had never posted it here at You Can Make That. I've been making it for years and I can't believe that I had never told you about it. My favorite way to serve this is over a green salad with cucumbers, tomatoes, and grated carrots. 

Dill Dressing

¼ cup olive oil
2 Tbsp. white vinegar
2 Tbsp. sour cream
1 tsp. prepared mustard
1 Tbsp. dried dill
½ tsp. salt

Measure all ingredients into a jar. Whisk to combine. Serve over green salad.

Saturday, September 28, 2013

Pumpkin Spice Creamer


Recently I tried a Pumpkin Smoothie recipe. I really liked it, but my kids were not impressed. So, I poured the leftovers into a canning jar and put it in the refrigerator. Later that day, the idea came to me that I could use the leftover smoothie as coffee creamer. This was a great solution to keep food from going to waste and it was yummy in my coffee. Although, it was a bit tart from the yogurt in the recipe.

I reworked the recipe and came up with the one below. It is smooth and thick. And, it even tastes great on its own without being too sweet. I am pleased that the One Time Pumpkin Smoothie evolved into something that I have gladly enjoyed and will make again and again.

Pumpkin Spice Creamer

¾ cup cooked pumpkin
2 cups milk
3 Tbsp. maple syrup
½ tsp. pumpkin pie spice

Add all four ingredients to a blender. Process until completely combined. Serve with your favorite coffee. Store in the refrigerator, and shake before serving.

You may also like to try homemade versions of Amaretto Creamer and Peppermint Mocha Creamer.

Tuesday, September 17, 2013

The Society


Do you collect jars? Peanut butter jars, jam jars, honey jars, spaghetti sauce jars, pickle jars? Well, I do and I am not ashamed to admit it. I use them to store dry foods like popcorn and banana chips in my pantry, for leftovers like chicken broth and bacon grease in my refrigerator, and for freezing things like bulk yeast and bread crumbs. And, this is not my first post talking about my love for jars. If you like, you can read more about my obsession here. My grandfather named this obsession many years ago when he noticed that my grandmother was saving all of her used jars. He called it: The Society for the Preservation and Protection of Old Pickle and Peanut Butter Jars. Are you a member?

I love my collection of jars, I'm just weird like that. Right now I am saving my jars for Christmas. I have two recipes picked out that I plan to give to neighbors, teachers, and co-workers. But, since many of these friends read You Can Make That, I will not be sharing my Christmas gift recipes just yet. 

Have you started thinking about your Holiday gift giving?

Friday, August 9, 2013

Bread Maker Bread

At the beginning of the year, I announced my Frugal Kitchen Goal's for 2013. Basically my four goals are:

1. Create a Weekly Meal Plan
2. Prepare Homemade Convenience Foods
3. Reduce Food Waste
4. Stock the Pantry 

Over the last eight months, I have worked diligently on my goals. But, I have made the least progress on #2. What I have realized is that with my transition from being a two parent home to a single parent home, I have twice the responsibility that I once had. Preparing homemade convenience foods is the most time consuming goal on my list and that is why I have not been able to make as much progress. 


So, after putting some thought into it, I decided that going back to using a bread maker might be a good way to obtain homemade bread with minimal effort. I have had two bread makers in the past which I have used until they have burned out. When the second one burned out, I learned to make homemade no-knead bread. After researching bread makers, I found that I was not willing to pay the high price tag! Thus, I began a thrift store search for a “like new” bread maker. It didn't take long for me to bring this one home for the very random price of $8.47.


I dug out my old Bread Machine Cookbook by Donna Rathmell German and began making bread. My machine works great and I have made more homemade bread in the last month than I have in the last six months combined.

 
I have made French Honey Bread (pictured above), Applesauce Bread, and Cinnamon Raisin Bread. Over the years, I have made many other breads from The Bread Machine Cookbook and I'm looking forward to trying them again.

Monday, July 29, 2013

Perishing Potatoes


A couple of weeks ago I came across a great sale on potatoes at the grocery store. They were buy one get one free, so I gladly purchased them. Sadly to say though, the potatoes were not a good investment. Close to half of them have perished before we could eat them. Normally potatoes have a long shelf life, but these must have been at then end of their life before I even brought them home. After making such a great effort to reduce food waste this year, I hate to see any more rot, so we have been working diligently to eat them up.


Tonight we are having Parmesan Potatoes along with some "Reduced for Quick Sale" steak.


The other day we had Fried Potatoes along with Meatloaf. The last few potatoes I may use to make a potato salad.

Has anything gone to waste in your kitchen lately?

Monday, July 15, 2013

Bread Crumbs


When I am at my best, I make all of our bread. Bread is simple to make, inexpensive, and requires no special tools. We love it, but lately I have not been making it regularly. Instead, I am buying much of our bread at an outlet store. The deals are excellent. They offer a military discount, and a punch card program to receive free bread. However, no one at my house wants to eat the end slices of store bought bread. So, for a while now I have been saving the end slices in a bag in the freezer. I use the end slices to make Baked French Toast or bread crumbs.

I primarily use bread crumbs in meatloaf or meat balls (recipe coming up soon!). And, I make mine plain without seasoning. But, the addition of Italian Seasoning would be great if you prefer. As I continue to eliminate food waste from my kitchen and reduce my grocery costs, this had been a great solution for unwanted bread.

Bread Crumbs

6 frozen bread slices

Tear bread in half and place in a food processor. Process until finely ground. Store in a canning jar in the freezer. Use in place of store bought bread crumbs directly from the freezer.

This post has been linked to Inspiration Monday.

Monday, July 1, 2013

Buttermilk Pancakes


Since the beginning of the year I have been making an effort to reduce food waste in my kitchen. Eating up leftovers was one of my biggest struggles. In the past, my late husband had always been glad to take all leftovers to work for lunch; so, I was not in the habit of eating them myself. I have learned that it only takes a little planning to make sure that these leftovers do not go to waste. Most often I eat them for lunch myself; however, if there is plenty leftover, we eat them for dinner, even if we are not all eating the same thing. I am glad to say that rarely do any leftovers make their way to the trash any more.

In preparation for our vacation, I also made an effort to make sure that we ate up any food that would go bad while we were gone. The week before we left, I made up a list of things that needed to be eaten and we ate them. Other foods like lunch meat and cheese I put in the freezer before we left. The only thing that ended up going to waste was 1/3 of a gallon of milk. I had meant to put it in the freezer the morning that we left, but completely forgot!

When we arrived home, it was early evening time and we had not yet had dinner. I knew that after traveling for an entire day, I would not feel like stopping at the grocery store. So, I had planned ahead to make Buttermilk Pancakes. Buttermilk keeps for weeks in the refrigerator and the rest of the ingredients I always have on hand. We were all glad to be home and pancakes for dinner are always a hit with my kids.

Buttermilk Pancakes

2 Tbsp. melted butter
1 egg
1 ½ cups buttermilk
2 cups white whole wheat flour
1 tsp. baking powder
½ tsp. salt
½ tsp. baking soda

Measure all ingredients into a bowl, and stir just until combined. Pour batter onto a hot buttered griddle and cook until bubbles on top pop (about 3-4 minutes). Flip and cook for an additional 203 minutes, or until thoroughly cooked. Serve hot with butter and syrup. Yield: 12 pancakes.

Serving Suggestion: Instead of maple syrup, try my family's favorite Cinnamon Syrup instead.

This post has been linked to Mop It Up Monday.

Thursday, June 27, 2013

Potato Wedges


Our vacation to New Mexico was with a group of 19 friends. We stayed in condos with full kitchens and we cooked all of our own meals. Each night for dinner, we took turns cooking for the entire group. Our final night, instead cooking a fresh meal, we heated up the left overs from the week and did our best to eat them up. We had some left over baked potatoes that weren't that appealing. So, I made Potato Wedges with them. We also had left over cheese, bacon, green onions, and sour cream. All of this was perfect for the Potato Wedges. Although we did have a bit of food waste on our trip, we certainly made a huge effort to avoid as much waste as possible. 

Potato Wedges

4 left over baked potatoes
Grated cheese
Crumbled bacon
Sliced green onions
Sour cream

Cut potatoes in half the long way. Scoop out the center and either discard or reserve for another use. Cut potatoes in half again the long way. Lay out the potato wedges on a baking sheet. Sprinkle with the cheese, bacon, and green onions. Bake at 350º for 30 minutes. Serve with sour cream or ranch dip.
 
This post has been linked to the Grace at Home Party.

Monday, May 20, 2013

Rosemary

 
Last week, my neighbor called me on her way home from work saying that a friend had given her a huge bunch of fresh rosemary. I was thrilled to take some off of her hands. So, tonight I made roasted potatoes with fresh rosemary. Yumm!

And, when I did my grocery shopping this morning, I was thrilled to find a whole chicken that was reduced for quick sale. (Perfectly in keeping with my New Year's Frugal Kitchen Goal.) It is going to be so tasty roasted with my fresh rosemary! How do you like to use rosemary?
 
This post has been linked to Mop It Up Mondays.

Monday, April 22, 2013

Caesar Salad Wraps


It has been a while since I have updated you on my New Year's Frugal Kitchen Goal. I have worked hard to bring down my weekly grocery bill, and I am happy say that I have been able to consistently keep within budget for the last six weeks! Plus, I have been taking advantage of some of the weekly specials and stocking up my pantry at the same time. Although it takes a conscientious effort to eat up produce before it goes bad and careful planning to utilize leftovers, it has been worth it.

So, with my Frugal Kitchen Goal in mind, I noticed a new idea on the lunch menu at a local restaurant last week while eating with friends. It was a Caesar Salad Wrap. Earlier in the week we had eaten Chicken Caesar Salad for dinner and I had some leftover homemade dressing in the fridge. So, for lunch one day I piled some lettuce, chicken, Parmesan cheese, and the leftover dressing onto a flour tortilla. It was delicious, and I'm certain that I will make more Caesar Salad Wraps in the future.

Recipe Link: Chicken Caesar Salad & Dressing

This post has been linked to Mop It Up Mondays.

Wednesday, March 20, 2013

Dried Fruit

 
While grocery shopping a few weeks ago, I saw packages of mixed dried fruit on sale as a closeout. The mix included dried peaches, apples, plums, and apricots. I was planning to buy dried apricots, but when I saw that the mixed fruit was on sale, I decided to get that instead. I purchased four packages. However, no one cared for the mix. So, they sat in my pantry untouched for weeks.
 
But, over the weekend I had a brainstorm. Why not separate the fruits? My oldest loves the apricots, my son loves the dried plums, and I could eat up the other fruits in my Oatmeal. So, I got out some mason jars and separated them. Now they are quickly disappearing and I have rescued another food from going to waste.
 
What have you done to reduce food waste this week?
 
This post has been linked to The Thrifty Home's Penny Pinching Party.

Wednesday, March 13, 2013

Orange Chess Pie


This weekend, while thumbing through recipes in my new cookbooks, I saw this recipe for Orange Chess Pie and thought it would be a great way to use up my fading oranges. They had been lounging on the counter for far too long and juicing them for this pie seemed like a perfect way to keep them from being thrown out. 

I had never made a Chess Pie of any kind before, but I had eaten Chess Pie many times while living in the South. I wasn't exactly sure if my kids would like it though, so I made the pie and took it to a group of friends on Sunday. Well, I shouldn't have been worried. We all loved it, and I will certainly be making this again!

Orange Chess Pie

1 stick softened butter
1 cup white sugar
3 eggs
3 Tbsp. corn meal
1 cup orange juice
1 Tbsp. lemon juice
Zest of one orange
Unbaked pie crust

Cream together butter and sugar. Add eggs one at a time. Add cornmeal. Slowly add juices and zest. Pour into pie crust. Bake at 350º for 45 minutes or until set. 

This post has been linked to The Thrifty Home Penny Pinching Party.
 

Wednesday, February 20, 2013

Homemade Cranberry Almond Delight

Photo Credit: Kar's Nuts

My girls absolutely love having this trail mix in their lunch boxes. I discovered Cranberry Almond Delight last fall while searching for some healthy lunch box options. However, since my New Year's Frugal Kitchen Goal, I have been working toward lowering my weekly grocery bill. And these individual packets are a bit pricey. But with only three ingredients, I knew I could duplicate this mix easily.

And, along with my effort to prepare more homemade convenience foods, I made a trip to my local dollar store to pick up some small reusable containers. These containers are perfect for my kids lunch bags and at two for a dollar, I won't be heartbroken if one accidentally gets lost or thrown away.

Cranberry Almond Delight

1 cup party peanuts
½ cup raw, whole almonds
½ cup dried cranberries.

Measure all three ingredients into a quart sized mason jar and shake to combine. Cover and store at room temperature.


Monday, February 18, 2013

Something for Nothing


We have two guinea pigs, Hercules and Thunder. We rescued them as soon as we moved to North Carolina last summer. They were skinny, unhappy, and very sick. However, we spent three months feeding them, loving them, and nursing them back to health. Since then Hercules and Thunder have provided us with endless entertainment and joy.

And those pigs can eat! Along with hay and commercial pet food they need fresh fruits and vegetables every day. When I plan my grocery shopping each week, I have to remember to get what Hercules and Thunder need too. Recently, we gave them some fresh spinach for the first time. They had a hard time figuring out how to eat it, which the kids giggled endlessly over. But, yesterday, while making a spinach salad for our dinner, I had a brainstorm. Instead of feeding them the leaves of the spinach, why not give them just the stems. They gobbled those stems up in no time and I was so pleased to find another way to make use of something that might otherwise have gone to waste.

Do you feed your pets food scraps?

Sunday, February 3, 2013

Homemade Amaretto Creamer

Photo Credit: Coffee-Mate

Over the last month I have worked diligently to stick to my New Year’s Frugal Kitchen Goal. I have done a good job of creating a weekly meal plan which has helped me to reduce unscheduled trips to the grocery store and has kept food waste to a minimum. And, as a side benefit, my refrigerator has never looked so clean. I have also made progress on getting my grocery budget back on track and stocking up my pantry, but I still have a ways to go.

A couple of weeks ago, when I was out of Half N Half for my coffee, I decided not to make an unplanned trip to the grocery store and make some flavored creamer at home. At Christmas time I had told you about the Homemade Peppermint Mocha Creamer that I made and I liked it so much that I tried a new version, Amaretto. This was even simpler to make and I have been so pleased with it that I have made up a second batch. I love how being frugal gets my creative juices flowing!

Amaretto Creamer

14 oz. can sweetened condensed milk
1 ¾ cup milk
2 tsp. almond extract

Pour sweetened condensed milk into a quart sized mason jar. Add milk and almond extract. Cover jar, and shake to combine. Store in the refrigerator and shake before serving with coffee.

Monday, January 21, 2013

Holiday Style Baked French Toast


As you know, part of my New Year’s Frugal Kitchen Goal is to reduce food waste. I’m feeling really good about our progress. Today at lunch, we ate up four different leftovers. It feels good to be filling our bellies instead of our trash can!

Last week, I tried something new to use up some leftover holiday egg nog. Instead of using milk in my Baked French Toast recipe, I substituted the egg nog. We loved it! Actually, we all preferred it over the usual recipe.  

Holiday Style Baked French Toast

5 cups bread cubes
4 eggs
1 ½ cups of egg nog (or milk)
1 tbsp. cinnamon sugar mixture (optional)

Spread bread cubes into a greased 9X9 pan. In a bowl, whisk together eggs and egg nog. Pour over bread cubes. Sprinkle with cinnamon sugar. Bake at 350˚ for 35 minutes.  Serve with syrup.

This recipe can be made the night before, refrigerated overnight, and baked in the morning. Or, it can be frozen, thawed overnight, and baked in the morning.

Frugal Tip: Keep a container in your freezer for odd pieces of leftover bread, rolls, and crusts. Cube the bread before you freeze it and when you have enough, make Baked French Toast.


Wednesday, January 9, 2013

Leftover Ham and Cheese Pie

Photo Credit: TLC

As planned, I served ham for Christmas dinner.  And, I had hoped to eat the leftover ham in sandwiches and such later that week. However, my refrigerator/freezer went out on Christmas day. Sigh. I had to scramble to borrow coolers and ice to keep the food from spoiling. So, the day after Christmas I was forced to cook a turkey and a roast, plus five pounds of other meat because I knew that it could not be refrozen until it was cooked.  Therefore, instead of eating up the leftover ham, we ate the turkey and the roast and put the ham into the freezer once it was fixed.

Although it was a lot of work to cook all of that meat at one time, I now have lots and lots of cooked meat in my freezer that makes dinner quick and simple. We love this Ham and Cheese Pie and it is a perfect recipe to use up leftover ham. And, of course I used my Homemade Baking Mix that I told you about yesterday.

Ham and Cheese Pie

2 cups cubed ham
2 cups grated cheddar cheese
4 eggs
2 cups milk
1 cup baking mix

Layer ham and cheese in the bottom of a large pie pan or 9X9 pan. In a bowl, stir together eggs, milk, and baking mix. Pour evenly over the ham and cheese. Bake at 400˚ for 35-40 minutes, or until golden.

Recipe Note: I halved this recipe in order to minimize leftovers. We ate every bite and it was the perfect amount for one adult and three kids. Frugal Kitchen Goal success!

Tuesday, January 8, 2013

Homemade Baking Mix

Photo Credit: Betty Crocker

Last week, I told you that I was recommitting to maintaining a frugal kitchen. For my first week of January, I was successful at creating a meal plan and sticking to it. And, somehow, I was able to make sure that all leftovers were eaten instead of tossed. Plus, I even used four aging bananas to make Chocolate Banana Bread for our breakfast this morning. I am feeling truly victorious!

Homemade convenience mixes are another way that can help to save money in the kitchen, so this past week I made up a batch of Baking Mix. This mix can be used just like boxed Bisquick and is perfect for quickly throwing together pancakes, biscuits, or muffins. However, I made up this Baking Mix specifically for my Ham and Cheese Pie recipe, which I will tell you more about tomorrow.

Homemade Baking Mix

5 cups flour (white, wheat, or white whole wheat)
¼ cup baking powder
2 Tbsp. sugar (white or raw)
1 tsp. salt
1 cup butter, softened (or shortening)

Add first 4 ingredients to large bowl. Slice butter and add to bowl. Using a pastry blender, cut butter into dry ingredients until it looks like coarse crumbs.

Store baking mix in the refrigerator for 7-10 days. Or, store in the freezer for up to one month. Baking mix can be used directly from the freezer without thawing it first.

This baking mix can be used in place of commercial baking mixes.
Related Posts Plugin for WordPress, Blogger...