Showing posts with label Breads. Show all posts

Tuesday, February 11, 2014

French Toast Sticks


My last loaf of Bread Maker Bread did not turn out well. It did not rise properly and was too dense for sandwiches. So, to keep it from going to waste, I made French Toast Sticks with it. I cut the bread into one inch slices and then cut each piece into four sticks. I dipped the sticks into an egg and milk mixture and then cooked them on a griddle just like traditional French Toast. My kids really enjoyed eating the sticks with their hands and dipping them into syrup. (Two of my kids dipped theirs in Cinnamon Syrup and my little one dipped hers in Chocolate Syrup.)
 
I refrigerated the leftovers and reheated them in the toaster oven for my little one to eat for lunch the next day. Next time, I would like to try an oven version instead. Seems like it would be simpler and I wouldn't have to stand over the griddle tending to them. If you have tried making homemade baked French Toast Sticks, I would love to hear about it.

Thursday, November 21, 2013

Cheddar Dill Muffins


I made a roast in the slow cooker the other night for dinner. And, to me, a roast is just not quite perfect unless it is served with homemade bread. So, I choose Cheddar Dill Muffins. I used to make these all the time, but I got tired of them and stopped making them for a while. My kids were glad to see them on the table again! 

These muffins are a cross between a biscuit and a muffin. And the cheese makes for a nice “crust” on the bottom. 

Cheddar Dill Muffins

2 Tbsp. melted butter
1 egg
1 cup milk
1 ¾ cup white whole wheat flour
1 ½ Tbsp. sugar (raw or white)
1 Tbsp. baking powder
1 tsp. dried dill
½ tsp. salt
1 cup grated cheddar cheese

Stir together all ingredients. Scoop into greased muffin pan. Bake at 400º for 15-20 minutes or until lightly golden. Cool for 10 minutes, remove from pan, and serve with butter.

Tuesday, November 19, 2013

Cinnamon Sugar Biscuits


We really love cinnamon at our house. It is definitely a comfort flavor for me. And, on Saturday I was craving some sticky-sweet cinnamon Monkey Bread. However, my kids had no intention of waiting hours for their breakfast so I decided to jazz up some regular biscuits with some cinnamon and sugar as a quick substitute. 

They turned out beautifully and my little one gobbled almost half of them all by herself! I used my favorite Sour Cream Biscuit recipe to start, but I am sure that you could use your tried and true recipe if you prefer. 

Cinnamon Sugar Biscuits

Biscuits:
2 cups white whole wheat flour
½ tsp. salt
½ tsp. baking soda
1 Tbsp. baking powder
¾ cup sour cream
Milk or water (enough to form biscuit dough)

Stir together all ingredients, adding enough milk to form desired consistency. Drop onto a 9X13 baking pan with a medium sized scoop, about ½ an inch apart. Flatten slightly. 

Cinnamon Sugar Topping:
½ cup melted butter
1 Tbsp. cinnamon
½ cup white sugar

Drizzle melted butter over biscuits. Stir together cinnamon and sugar. Sprinkle over biscuits. Bake at 450º for 10-12 minutes. Cool for 10 minutes, then serve. Yield: 20 biscuits.

Friday, August 23, 2013

Cinnamon Honey Butter


Have you ever been to a restaurant and tasted freshly baked rolls served with a sweetened butter spread? Delicious! Well, I created this Cinnamon Honey Butter as a restaurant copy. My son, who has a terrible sweet tooth, really likes this on warm bread. And, although we love having Cocoa Cinnamon Spread on hand for toast and leftover rolls, I prefer this because it is not as sweet.

Cinnamon Honey Butter

1 stick butter, softened
3 Tbsp. honey
¼ tsp. cinnamon
1/8 tsp. vanilla

Wisk together all four ingredients. Spread on toast, bagels, rolls, etc. Store at room temperature.

This post has been linked to The Thrifty Home's Penny Pinching Party.

Friday, August 9, 2013

Bread Maker Bread

At the beginning of the year, I announced my Frugal Kitchen Goal's for 2013. Basically my four goals are:

1. Create a Weekly Meal Plan
2. Prepare Homemade Convenience Foods
3. Reduce Food Waste
4. Stock the Pantry 

Over the last eight months, I have worked diligently on my goals. But, I have made the least progress on #2. What I have realized is that with my transition from being a two parent home to a single parent home, I have twice the responsibility that I once had. Preparing homemade convenience foods is the most time consuming goal on my list and that is why I have not been able to make as much progress. 


So, after putting some thought into it, I decided that going back to using a bread maker might be a good way to obtain homemade bread with minimal effort. I have had two bread makers in the past which I have used until they have burned out. When the second one burned out, I learned to make homemade no-knead bread. After researching bread makers, I found that I was not willing to pay the high price tag! Thus, I began a thrift store search for a “like new” bread maker. It didn't take long for me to bring this one home for the very random price of $8.47.


I dug out my old Bread Machine Cookbook by Donna Rathmell German and began making bread. My machine works great and I have made more homemade bread in the last month than I have in the last six months combined.
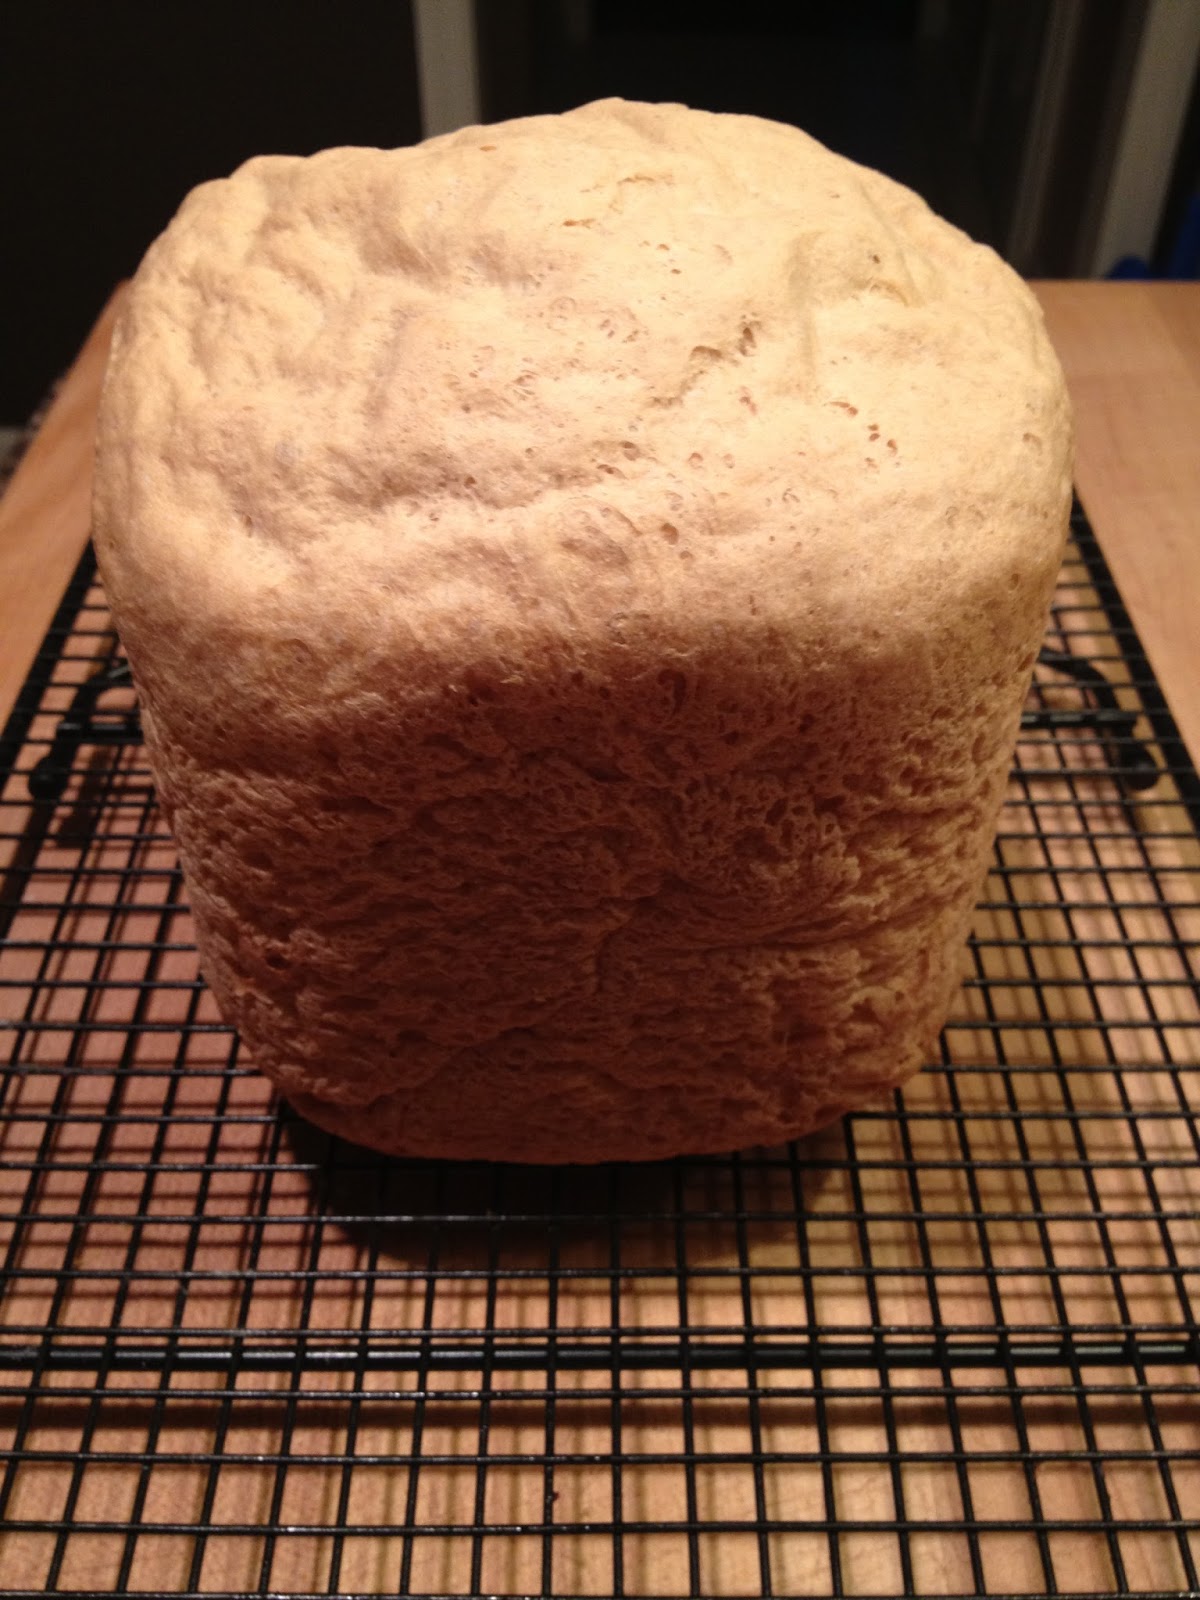
 
I have made French Honey Bread (pictured above), Applesauce Bread, and Cinnamon Raisin Bread. Over the years, I have made many other breads from The Bread Machine Cookbook and I'm looking forward to trying them again.

Monday, July 15, 2013

Bread Crumbs


When I am at my best, I make all of our bread. Bread is simple to make, inexpensive, and requires no special tools. We love it, but lately I have not been making it regularly. Instead, I am buying much of our bread at an outlet store. The deals are excellent. They offer a military discount, and a punch card program to receive free bread. However, no one at my house wants to eat the end slices of store bought bread. So, for a while now I have been saving the end slices in a bag in the freezer. I use the end slices to make Baked French Toast or bread crumbs.

I primarily use bread crumbs in meatloaf or meat balls (recipe coming up soon!). And, I make mine plain without seasoning. But, the addition of Italian Seasoning would be great if you prefer. As I continue to eliminate food waste from my kitchen and reduce my grocery costs, this had been a great solution for unwanted bread.

Bread Crumbs

6 frozen bread slices

Tear bread in half and place in a food processor. Process until finely ground. Store in a canning jar in the freezer. Use in place of store bought bread crumbs directly from the freezer.

This post has been linked to Inspiration Monday.

Thursday, July 11, 2013

Pizza Bread


I have told you several times before that I love using the method for refrigerator bread dough outlined in Artisan Bread in Five Minutes a Day. My favorite way to use it is for pizza. My kids favorite is Pizza Rolls, which is pepperoni and mozzarella cheese wrapped inside a roll. So, it seemed natural to me to combine these two ideas to make Pizza Bread. It is a pull apart bread similar to Monkey Bread. I served it with pizza sauce for dipping and my kids fell in love with it!

Pizza Bread

2 lbs. Artisan Bread Dough
¼ cup olive oil
1 Tbsp. Italian Seasoning
2 cups shredded mozzarella cheese
6oz. sliced pepperoni
Pizza sauce for dipping

Form dough into walnut sized balls (approx. 48). Arrange 1/3 of the dough in the bottom of a fluted pan. Drizzle with 1/3 of the olive oil and sprinkle with 1/3 of the Italian Seasoning. Layer half of the pepperoni and 1/3 of the cheese on top. Repeat. Layer the last of the dough on top, drizzle with the last of the oil, and sprinkle with the last of the Italian Seasoning. Finally layer the last of the cheese. Let rise for 45-60 minutes. Bake at 350º for 35 minutes. Cool for 10 minutes. Invert onto a serving plate. Serve warm with pizza sauce.

Recipe Note: You can find the Master Recipe for this dough in Artisan Bread in Five Minutes a Day, along with an instructional video here.

This post has been linked to the Penny Pinching Party.

Tuesday, June 25, 2013

Sour Cream Biscuits


We returned from our vacation a week ago and left again almost immediately to help out some friends who had a death in the family. We finally came home on Saturday night; and, we are still moving quite slowly. Two weeks into summer vacation and we are just now enjoying our time to sleep in, which to me is the best part of summer.

I love these lazy days, slowly sipping my coffe in the morning while making breakfast. As you know, biscuits are on our regular rotation (Easy Cream Biscuits, Maple Biscuits, and Homemade Baking Mix Biscuits). So, recently I thought that we would try something new, Sour Cream Biscuits. These are quick to mix up and I always have the ingredients on hand. We have had them twice now and I am pleased with the results. Plus, I like that with this recipe it is still possible to make fresh biscuits without milk or cream. 

Sour Cream Biscuits

2 cups white whole wheat flour
½ tsp. salt
½ tsp. baking soda
1 Tbsp. baking powder
¾ cup sour cream
Milk or water (enough to form biscuit dough)

Stir together all ingredients, adding enough milk to form desired consistency. Drop onto baking pan with a medium sized scoop, about ½ an inch apart. Flatten slightly. Bake at 450º for 10-12 minutes. Serve immediately. Yield: 20 biscuits.

This post has been linked to The Thrifty Home's Penny Pinching Party.

Monday, May 6, 2013

Homemade Baking Mix Biscuits


Yesterday my little one was sick. We had planned to attend a birthday party, but we had to cancel. My older two were disappointed. Plus, it was raining, which meant that they were not able to go outside to play. No one was happy. But, mom to the rescue! As my little one began to feel better in the afternoon, we made a trip to the dollar store and everyone was able to pick something. And later we watched a movie from the library.

As I began to think about dinner, I knew that I just might have a revolt on my hands if I didn't do something that they loved. After all they missed out on pizza, cake, and ice cream at the party. So, I asked them what they would like. The answer was Chicken Caesar Salad. I was a bit surprised. But, I had all of the ingredients on hand, so that's what we had. Usually I like to serve some kind of bread when we have a main dish salad. I remembered that I had one lonely cup of my Homemade Baking Mix in the freezer, so I made biscuits. Not exactly kids party food, but everyone was pleased.

Homemade Baking Mix Biscuits

1 cup baking mix
1 ½ tsp. sugar
1/3 cup milk

Measure all ingredients into a bowl and stir lightly until combined. Scoop onto a baking pan, flatten slightly. Bake at 400º for 12-15 minutes. Yield 7 small biscuits.

This post has been linked to Mop It Up Monday.

Thursday, April 25, 2013

Nutella Swirl Bread


Nutella is a treat at our house. If you are not familiar with this chocolate hazelnut spread, give it a try. It is sold along side of the peanut butter at the grocery store. I warn you though, it is not a health food, it is more like dessert. But my kids love it, so we will indulge once in a while.

I prefer to eat my Nutella as a snack on crackers. My kids, however, like it in a sandwich. So, that got me thinking that they might enjoy it baked into bread just like Cinnamon Swirl Bread. And, I was right. It was gooey and delicious and I'm sure I will have many requests for this in the future!

Nutella Swirl Bread

1 lb. Artisan bread dough
1/3 cup Nutella
1Tbsp. Melted butter

On a floured surface, roll out bread dough into a rectangle (approx. 9X18). Spread Nutella onto the dough. Roll up the dough, starting with the short end. Pinch the seams to seal. Place in a greased loaf pan, cover with a towel, and let rise for 30-60 minutes. Bake at 350º for 35-40 minutes or until golden. Brush with melted butter. Cool 10 minutes and remove from pan. Serve warm.

Note: I use the method outlined in Artisan Bread in Five Minutes a Day written by Jeff Hertzberg and Zoe Francois. You can find the Master Recipe for this Artisan Bread Dough along with an instructional video here.

This post has been linked to Mop It Up Mondays.

Friday, April 12, 2013

Corn Muffins


The other day I was contimplating what to make for dinner when I realized that I hadn't made Corn Muffins in months. How could I forget about them? My kids love them and they are quick to make. Two out of three of my kids cheered when they saw them come out of the oven. I was a hero!

These Corn Muffins are slightly sweet because of the sugar and a bit more dense than traditional corn muffins because of the white whole wheat flour. This recipe can also be made in a 8X8 baking pan, but I prefer to make them into muffins because they are less crumbly for the kids to eat.

Corn Muffins

1 cup corn meal
1 cup white whole wheat flour (or all purpose flour)
2 Tbsp. sugar (raw or white)
1 Tbsp. baking powder
½ tsp. salt
1 cup milk
1 egg
¼ cup melted butter

Measure dry ingredients into a bowl. Add milk, egg, and melted butter. Stir, just until combined. Scoop into a greased muffin pan. Bake at 425º for 12-15 minutes, or until lightly golden. Cool for 10 minutes, then remove from pan. Serve warm with butter. Yield: 12 muffins

Monday, March 25, 2013

Pull Apart Rolls


Today is one of those days. Mondays can be like that sometimes. So comfort food is on the menu. Right now there are warm rolls on my counter and a cake in the oven. I have been kind of obsessed with these rolls lately and I have made them twice in the last week. 

As I have mentioned before, I have trouble with carpal tunnel, which means that I only make no-knead bread recipes. This recipe is a bit more traditional than the Quick Yeast Rolls that I have shared with you before. And, they hold up pefectly for little sandwiches. Although they are best fresh out of the oven, they do keep a couple of days without getting too stale.

Pull Apart Rolls

2 ¼ tsp. active dry yeast (or a ¼ oz. packet)
1 ½ cups warm water (110º)
2 Tbsp. sugar
2 Tbsp. melted butter
1 ½ tsp. salt
1 ½ cups white whole wheat flour
2 ½ cups all purpose flour
2 Tbsp. melted butter

Dissolve yeast in warm water along with the sugar, melted butter, and salt. Let sit for 10 minutes. Stir in flour. (The dough should pull away from the sides of the bowl and form a ball.) Cover and let rise until doubled, about 45-60 minutes. 

Punch down dough and on a floured surface shape into 18 rolls. Place rolls in a greased 9X13 pan. Cover and let rise again until doubled, about 45-60 minutes.

Uncover and bake at 400º for 15-20 minutes or until golden. Brush with melted butter.

This recipe was adapted from the one found here at food.com.

This post has been linked to Mop It Up Mondays.

Friday, February 15, 2013

Cinnamon Swirl Bread

 
It seems like it has been a while since I have shared an Artisan Bread Dough recipe. I use my dough primarily for pizza; but, lately we have been enjoying Cinnamon Swirl Bread on Saturday mornings. Last weekend, when the last slice was devoured, my kids asked that I make two loaves instead of just one next time. My kids rarely fall in love with food, and although they have their favorites, specific food requests are almost non-existent. So, I am especially pleased that they like this bread so much.
 
Cinnamon Swirl Bread

1 lb. artisan bread dough
¼ cup white sugar
1 tsp. cinnamon
2 Tbsp. melted butter, divided

On a floured surface, roll out bread dough into a rectangle (approx. 9X18). Brush with half of the melted butter. Sprinkle with sugar and cinnamon. Roll up the dough, starting with the short end. Pinch the seams to seal. Place in a greased loaf pan, cover with a towel, and let rise for 30-60 minutes. Bake at 350º for 35-40 minutes or until golden. Brush with remaining melted butter. Cool 10 minutes and remove from pan. Serve warm.
 
Note: I use the method outlined in Artisan Bread in Five Minutes a Day written by Jeff Hertzberg and Zoe Francois. You can find the Master Recipe for this Artisan Bread Dough along with an instructional video here .

Tuesday, February 12, 2013

Simply Homemade

Last week I started a new cooking class series called Simply Homemade. The focus of the series is to create quick and easy recipes from scratch. Four ladies attended the class and we had so much fun laughing and talking and cooking together!

We started with basic bread baking information and jumped right in and prepared Quick Yeast Rolls. Three of the ladies had never worked with yeast or made bread of any kind, so it was a true learning experience.


The second recipe that we prepared was Chicken Caesar Salad. This is a fast weeknight meal to use up leftover chicken. One of the ladies has already reported back to me that she has made this for her family and 5 out of 6 of them loved it!


Cooking classes are a great way to spend time with friends and to learn something new. Have you ever taught a cooking class?

Monday, January 14, 2013

Fascinating Find - Maple Biscuits


We are all bread lovers at my house. Rolls, biscuits, crusty bread, sandwich bread, beer bread, etc. We love it all. So, when I saw this recipe for Maple Biscuits, I knew right away that I needed to try it. Well, they were a hit with my kids!! They are slightly sweet, moist, and flavorful. We enjoyed them so much that I made them a second time within a week. And I am certain that I will make these again and again.

I found the recipe at Back of the Box Recipes, a website that catalogs name brand recipes. The first time I made them, I followed the recipe. But, the second time I made them, I substituted white whole wheat flour for the all purpose flour and raw sugar for the brown sugar. I also dropped them on the pan with a large cookie scoop instead of rolling and cutting them. This was much quicker. Either way, they were simply delicious!

Be sure to check out Back of the Box Recipes for recipe ideas of all kinds, coupons, and helpful kitchen tips.

Recipe Link: Maple Biscuits

Tuesday, January 8, 2013

Homemade Baking Mix

Photo Credit: Betty Crocker

Last week, I told you that I was recommitting to maintaining a frugal kitchen. For my first week of January, I was successful at creating a meal plan and sticking to it. And, somehow, I was able to make sure that all leftovers were eaten instead of tossed. Plus, I even used four aging bananas to make Chocolate Banana Bread for our breakfast this morning. I am feeling truly victorious!

Homemade convenience mixes are another way that can help to save money in the kitchen, so this past week I made up a batch of Baking Mix. This mix can be used just like boxed Bisquick and is perfect for quickly throwing together pancakes, biscuits, or muffins. However, I made up this Baking Mix specifically for my Ham and Cheese Pie recipe, which I will tell you more about tomorrow.

Homemade Baking Mix

5 cups flour (white, wheat, or white whole wheat)
¼ cup baking powder
2 Tbsp. sugar (white or raw)
1 tsp. salt
1 cup butter, softened (or shortening)

Add first 4 ingredients to large bowl. Slice butter and add to bowl. Using a pastry blender, cut butter into dry ingredients until it looks like coarse crumbs.

Store baking mix in the refrigerator for 7-10 days. Or, store in the freezer for up to one month. Baking mix can be used directly from the freezer without thawing it first.

This baking mix can be used in place of commercial baking mixes.

Thursday, November 15, 2012

English Muffin Bread

Photo Credit - Money Saving Mom

It has been close to six months since I have made homemade sandwich bread, and my son especially misses it. Typically I make Multigrain Sandwich Bread, but yesterday I decided to try something new. I saw this recipe for a no knead English Muffin Bread on Crystal’s blog called Money Saving Mom back in June. And, I am happy to say that it was super simple and delicious! 

I am not exactly sure why this bread is called English Muffin Bread. It neither had the texture of English muffins, nor the taste of them. But, I am definitely not holding that against it because we all loved it. Although the recipe called for all purpose flour, I substituted two cups of white whole wheat flour for part of it because I did not have enough all purpose flour on hand. I also baked it in three, one pound loaf pans instead of in two larger loaf pans so that I could give a loaf to my neighbor. But, it turned out beautifully even with these changes.

Crystal, at Money Saving Mom, has lots of money saving tips, frugal recipes, and coupon advice. So be sure to check out her blog below:

Blog Link: Money Saving Mom
Recipe Link: English Muffin Bread

Thursday, June 21, 2012

Fascinating Find - No-Knead Beer Bread


You already know that I am in love with Artisan Bread. It is versatile, simple to work with, and frugal. However, it takes some planning ahead to make. This No-Knead Beer Bread can be made in a single batch and does not require refrigeration before baking. So, although it still takes 4 hours from start to finish, it is definitely a quicker process with a great flavor. We ate it with butter slathered on it with dinner one night, made Panini out of it the next day, and used the final scraps for homemade croutons. It was crusty, flavorful, and tasty. I will definitely be making this again.

Chef John at Food Wishes is the author of this fantastic recipe. You can find the recipe and an instructional video at the link below. Chef John also has lots of other delicious looking recipes on his blog, so be sure to check it out!

Blog Link: Food Wishes
Recipe Link: No-Knead Beer Bread

This post has been linked to Try New Adventures Thursday.

Wednesday, April 18, 2012

Crumpets


These may look suspiciously like pancakes, but do not be deceived. They are more like English Muffins and are absolutely delightful! We enjoy them hot off the griddle with butter, or split open and toasted with butter and jelly. While my oven has been broken, these have become our “bread.”  My kids have enjoyed taking this in their lunches as sandwiches; and, my oldest has even requested that I make these instead of our regular sandwich bread from now on. These freeze well, so don’t be afraid to make a full sized batch.

Crumpets

2 Tbsp. plus ¾ tsp. yeast
¾ cup warm water (100-110˚)
1 Tbsp. sugar (white or raw)
1 cup warm milk
3 eggs
2 cups white whole wheat flour
1 cup all purpose flour
1 ½ tsp. salt
Butter


Mix the yeast, warm water and sugar in a large bowl.  Let the yeast rest for 10 minutes. Stir in warm milk, flour, eggs and salt until no longer lumpy.  Cover with a towel and let rise for 45 minutes.  Heat a skillet/griddle to medium high heat and butter generously.  Scoop out 3 Tablespoons of batter onto skillet for each crumpet. Cook on one side until they appear mostly dry on top.  Then, flip them and cook for another 2-3 minutes, or until browned. Serve immediately. Yield: 18 Crumpets.

This recipe was adapted from this one found on allrecipes.com

Wednesday, February 22, 2012

Artisan Bread


To me, there is nothing better than a loaf of crusty bread to round out a meal. My kids literally jump for joy when I serve this bread, hot from the oven. It makes it to our table about once a week. I use the simple bread making process outlined in Artisan Bread in Five Minutes a Day. It is quick and easy, even for a beginner. The dough is mixed up in large batches, in advance, and is stored in the refrigerator for future use. The dough can be stored for up to 14 days, so there is no rush to use it up immediately. (You can read my full book review on Artisan Bread in Five Minutes a Day, here.)

I like to make my Artisan Bread with half white flour and half white whole wheat flour. And I have a batch ready to go in my refrigerator most of the time. I have also added chopped olives or diced pepperoni to my bread with great success. You can find the Master Recipe for this Artisan Bread in Five Minutes a Day, along with an instructional video, here.

If you are an Artisan Bread Dough lover, you may be interested in these additional recipes that have been previously posted here on You Can Make That!


Related Posts Plugin for WordPress, Blogger...